| How to Promote a Server to a Domain Controller | 您所在的位置:网站首页 › promote by › How to Promote a Server to a Domain Controller |
How to Promote a Server to a Domain Controller
|
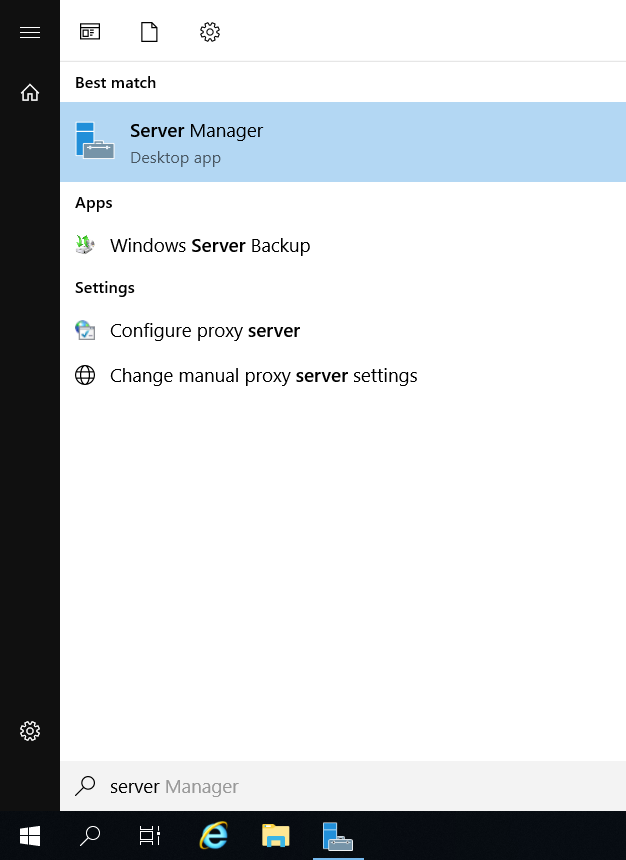
Active Directory is a directory service that stores data in the form of an object. Active Directory helps administrators to manage users and resources across a network. It is a service developed by Microsoft for Windows domain networks. Click on the link to learn more about Active Directory. In this article, we’ll learn how to install the Active Directory role on a server and then Promote a Server to a Domain Controller. Table of Contents Toggle How to install Active Directory Users and Computers 1. Open your Server Manager ProgramOpen your server manager from the start menu or run the command “ServerManager”
Now select “Manage” on the top right side then select “Add Roles and Features.“
In the “Before You Begin” section, you need to validate the three specified tasks. An Administrator account has a strong password. Network settings, such as static IP addresses, are configured. The most current security updates from Windows Update are installed.
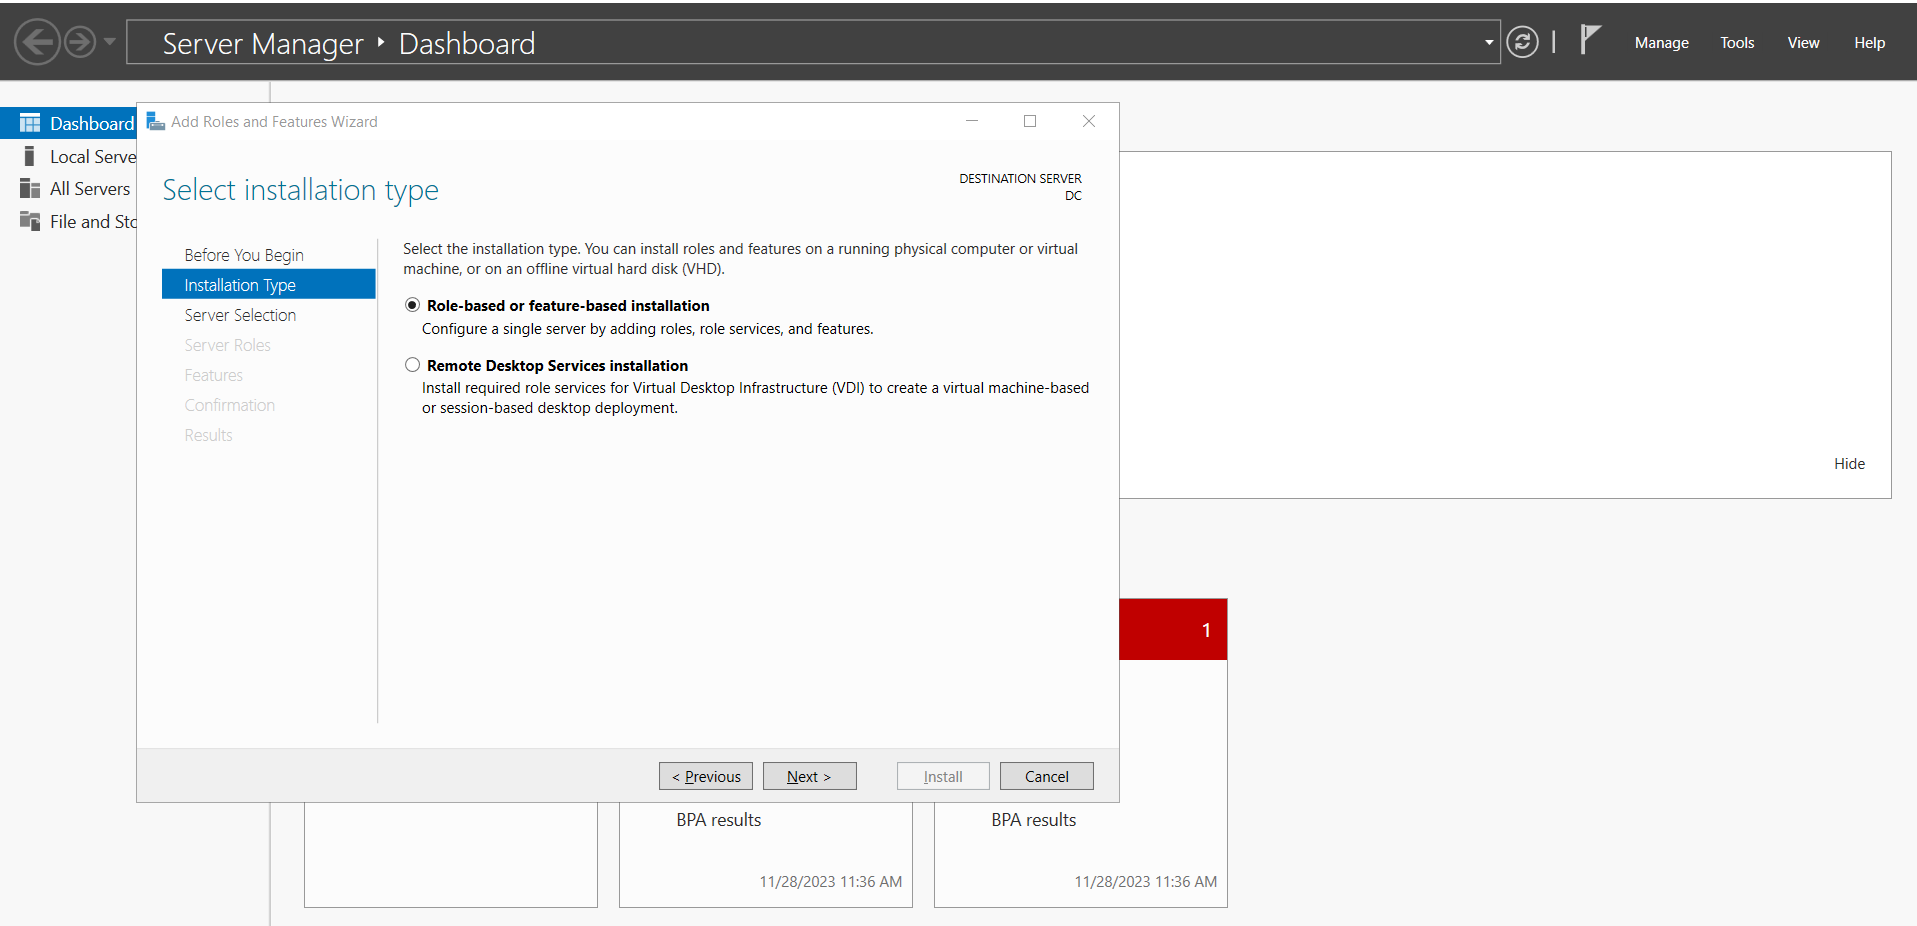
Now we have to select the installation type “Role-based or feature-based installation” and then click on “Next”.
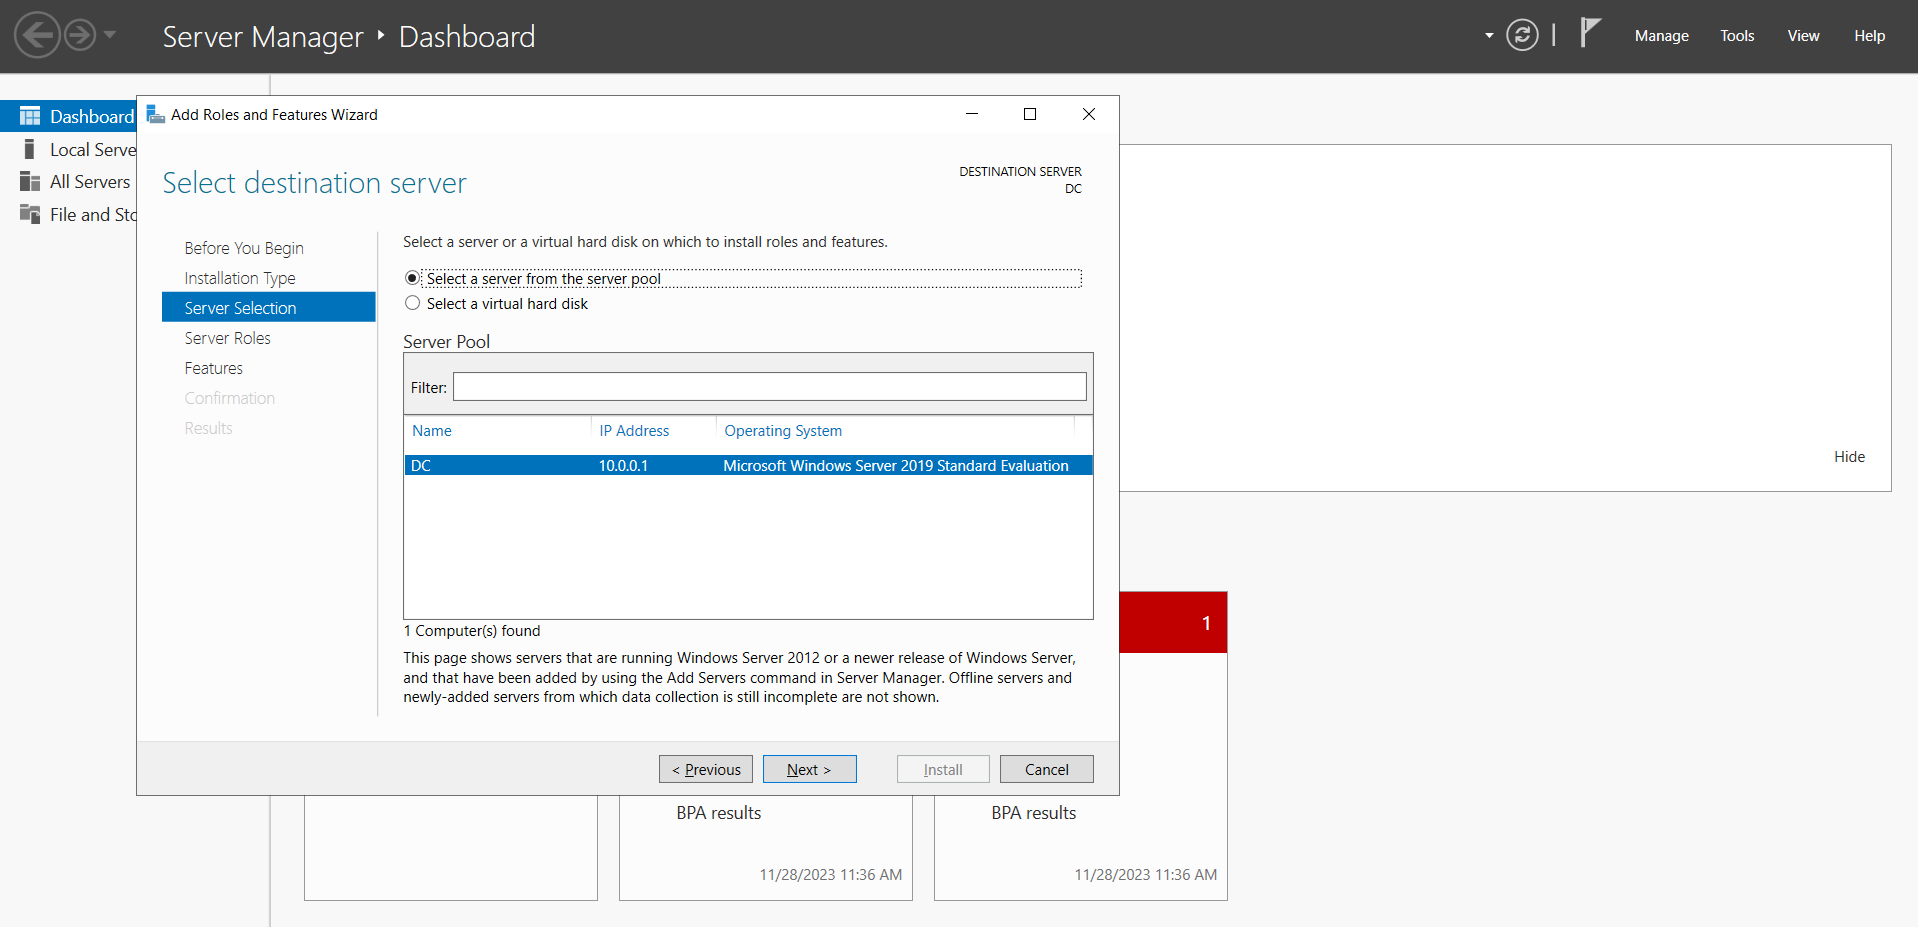
In the server selection, you have to select your server from the “server pool” and then hit “Next”.
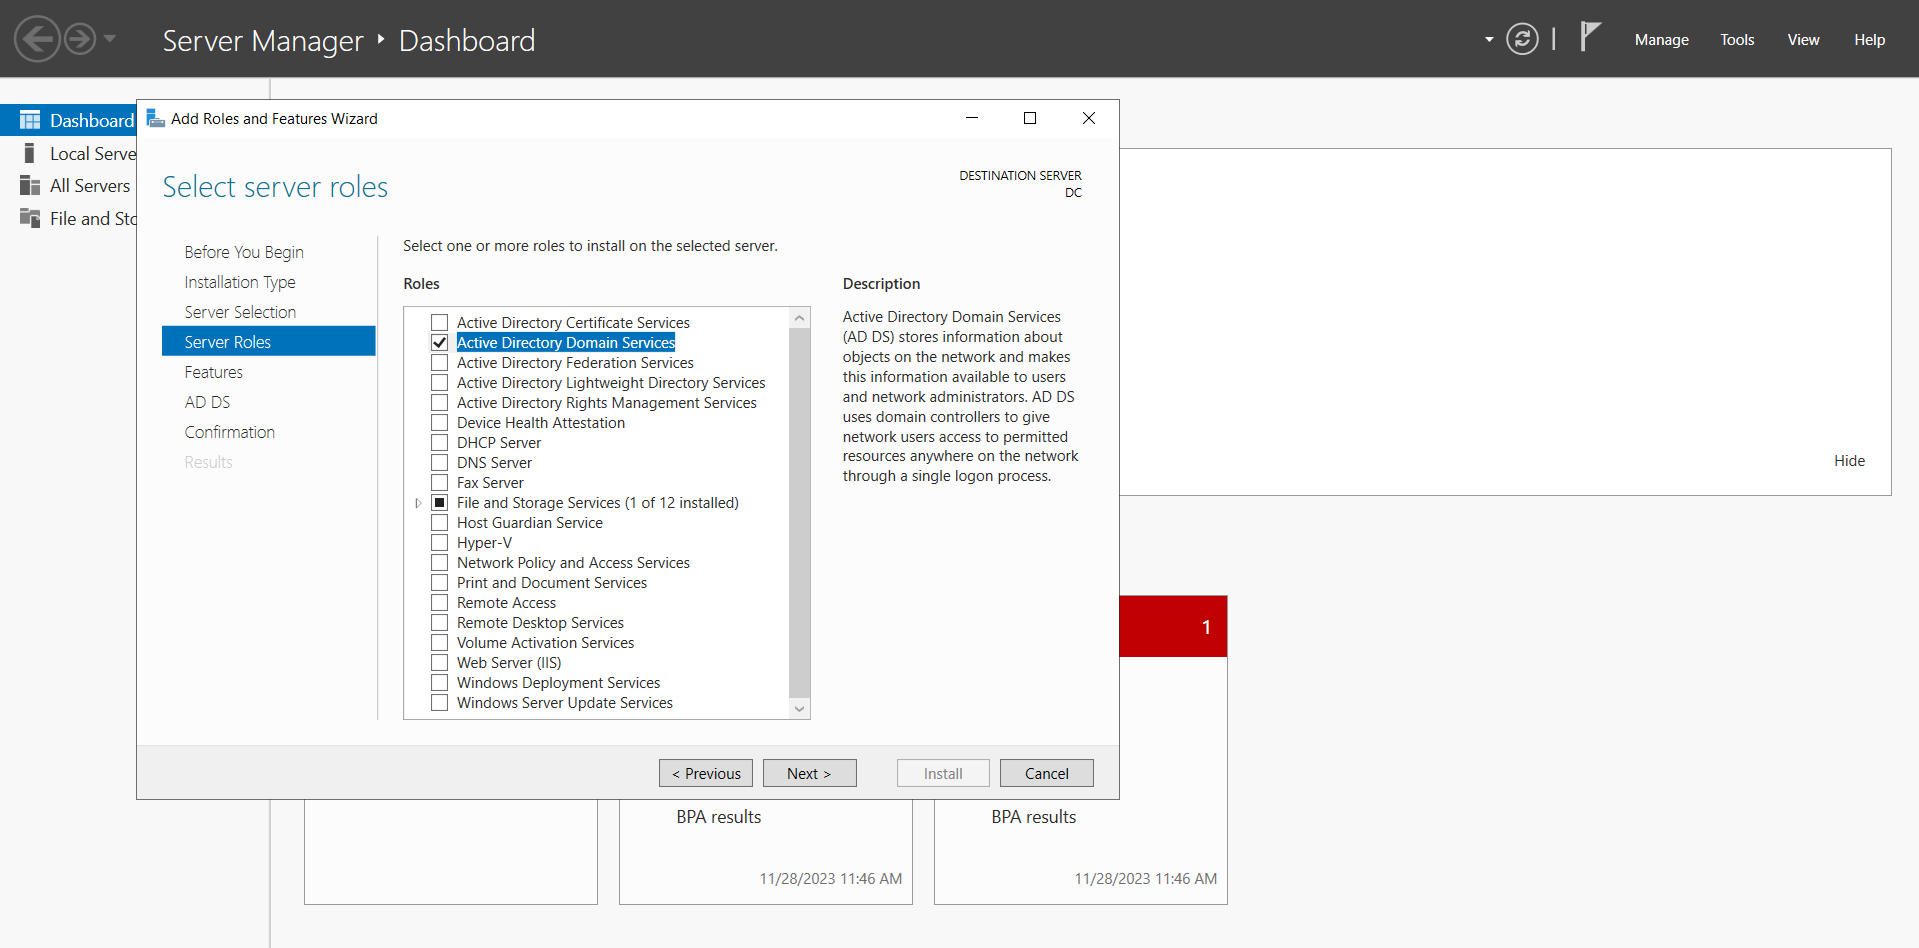
Now here you’ll see multiple server roles. Choose the roles essential for your deployment. Currently, as we are installing and configuring Active Directory, we are adding basic features for that purpose. So I’m just selecting “Active Directory Domain Services” Leave the settings at default, then click “Add Features”: Note: The DNS server will automatically install in the AD Primary Domain Controller (PDC) even if you do not select the service.
Here features such as “.NET, Group Policy Management, Remote Server Administration Tools, Windows Defender, and PowerShell” will be automatically chosen by default. Depending on your specific deployment needs, you can incorporate additional roles as necessary.
After completing the previous step, you will be redirected to add the “Active Directory Domain Services” feature. Click “Next” on the installer wizard window. 7. Installation Summary ConfirmationIn the summary section, review the selected features. If everything appears correct, proceed by clicking on the “Install” button Note: It is a good practice to reboot your machine after installing these roles. You can also select the checkbox in the “Confirmation” option.
It’ll take a few moments to install Active Directory roles and features.
We have successfully installed the necessary roles on the server now it’s time to promote the server as a domain controller. 1. Open Server ManagerOpen your server manager from the start menu or run the command “ServerManager”
At the top right-hand side, locate the flag icon, click on it, and then choose “Promote this server to a domain controller.”
In the deployment configuration popup screen, you will be presented with three options: joining an existing domain, adding a new domain to an existing forest, or adding a new forest. Add a domain controller to an existing domain: An Additional DC installation is performed on the existing domain structure with this option. Add a new domain to an existing forest: A Child Domain installation is performed on the existing domain structure with this option. Add a new forest: A new domain installation is performed with this option.As we are installing the first domain controller in our network, select the last option. Click “Add a new forest”.
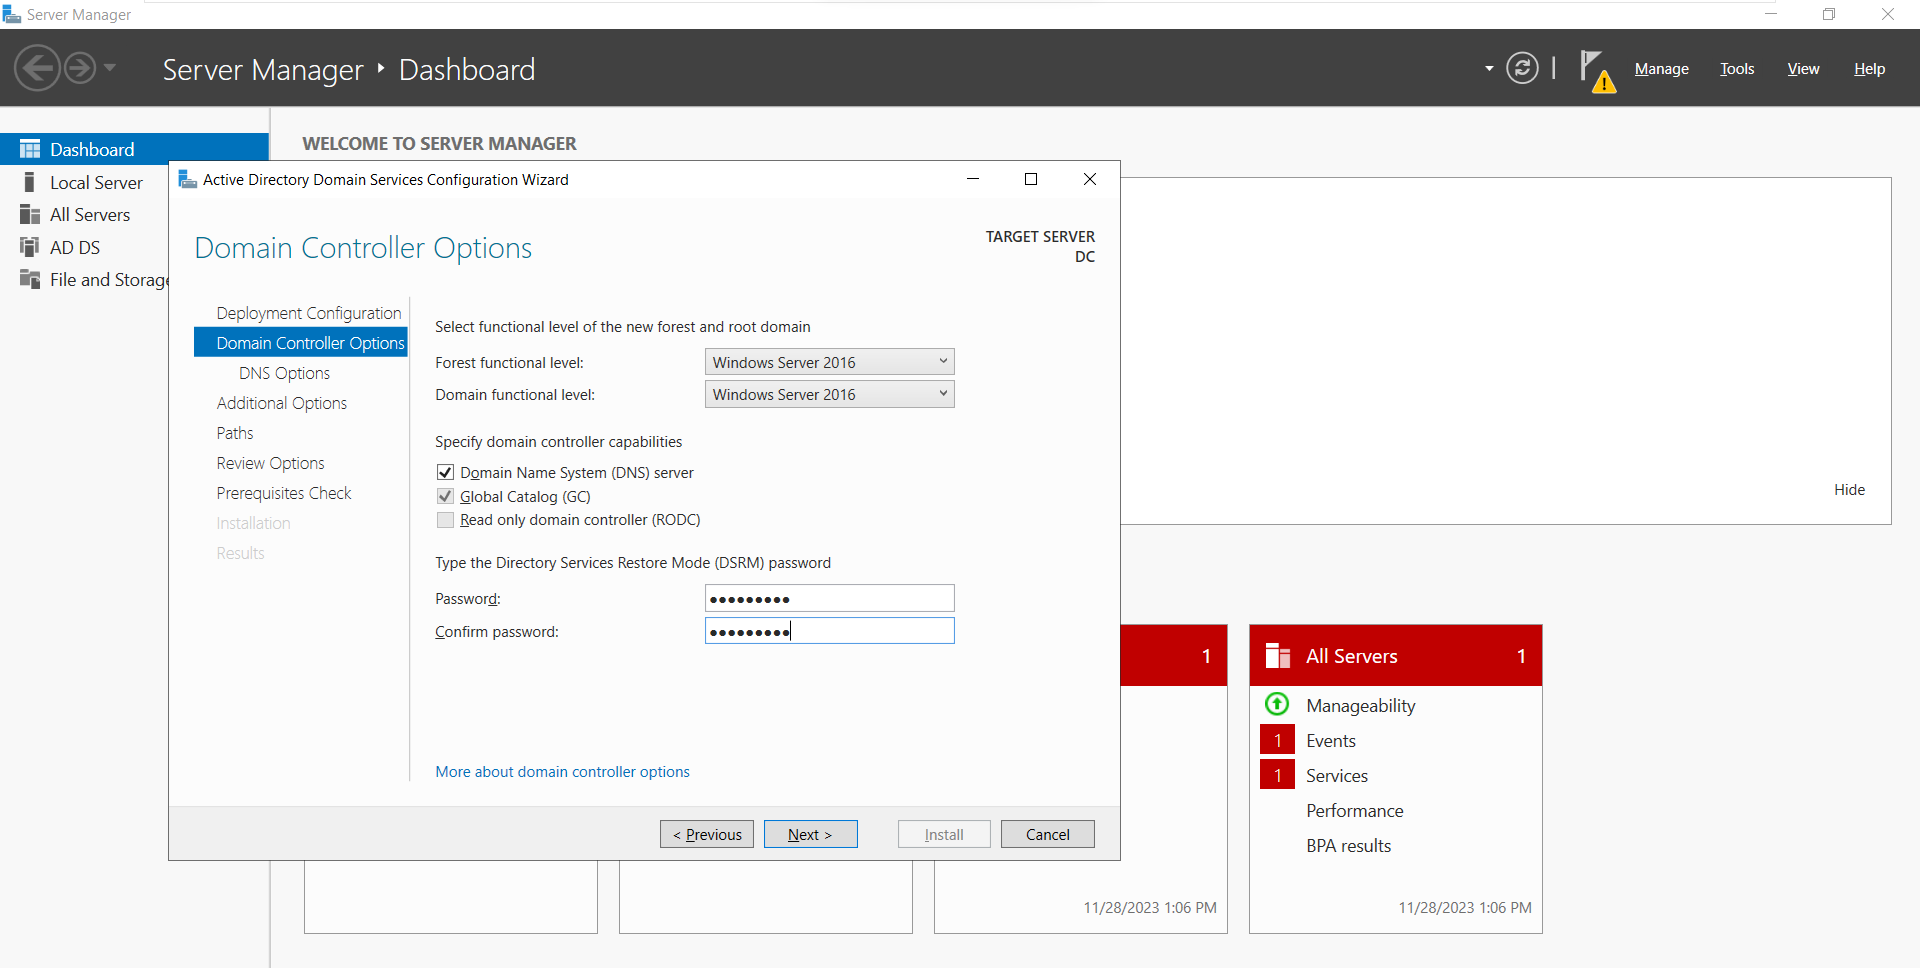
Functional levels define the capabilities accessible within Active Directory Domain Services (AD DS) domains or forests. They also determine which Windows Server operating systems you can run on domain controllers in the domain or forest. Note: Functional levels do not affect which operating systems you can run on workstations and member servers that are joined to the domain or forest. You should only choose older options if you have older domain controllers in your domain or forest. As of now, we are creating a new domain so you can select any highest-level functionality.
A Short description of these terms is mentioned on the screen. We’ll explain these terms later. DSRM (Directory Services Restore Mode) is specifically designed for repairing and recovering backups of Active Directory (AD) objects. You can add your password in the DSRM section. It is managed by NTDSUTIL command. Global Catalog stores a complete copy of AD object attributes and a partial copy of all object attributes of all other domains. RODC: Except for account passwords, an RODC holds all database objects and attributes. It is used where security is a major concern. This option is disabled for Primary Domain Controler but for other DCs it is optional. 4.1 DNS DelegationNow in the DNS option, you’ll see a warning message “A delegation for this DNS server cannot be created because the authoritative parent zone cannot be found…” This warning occurred due to the absence of a DNS Server in the environment, and authorization has not been granted to access the Coderepublics.com Zone from the external environment (Internet) on this DNS Server. You can skip this warning as it is your first forest’s domain.
It stands for Network Basic Input / Output System. NetBIOS name will remain the same as we have specified in the domain configuration step. When configuring your domain environment, if you type Coderepublics.com for the domain name, this request will be interpreted on the DNS Server and you’ll receive a reply. If you type only CODEREPUBLICS, without the suffix, it will be interpreted on WINS (DNS translates host names into IP addresses, while WINS resolves NetBIOS names to IP addresses), if any, and you will receive a reply in this case. If there are no WINS, the Domain is found by Broadcast message. On a Windows operating system, you can log in using the format “[email protected]” or “CODEREPUBLICS\kuldeep.” However, for non-Microsoft products, the spelling as [email protected], which we call UPN (Universal Principle Name), is not supported, and you must use the NetBios name in the form of CODEREPUBLICS\kuldeep, which we call SamAccountName. WARNING!: You can change the Domain NetBIOS Name information as you wish, but NEVER add the Host Name of the Server on which you install the Domain Controller as this Domain NetBIOS Name! 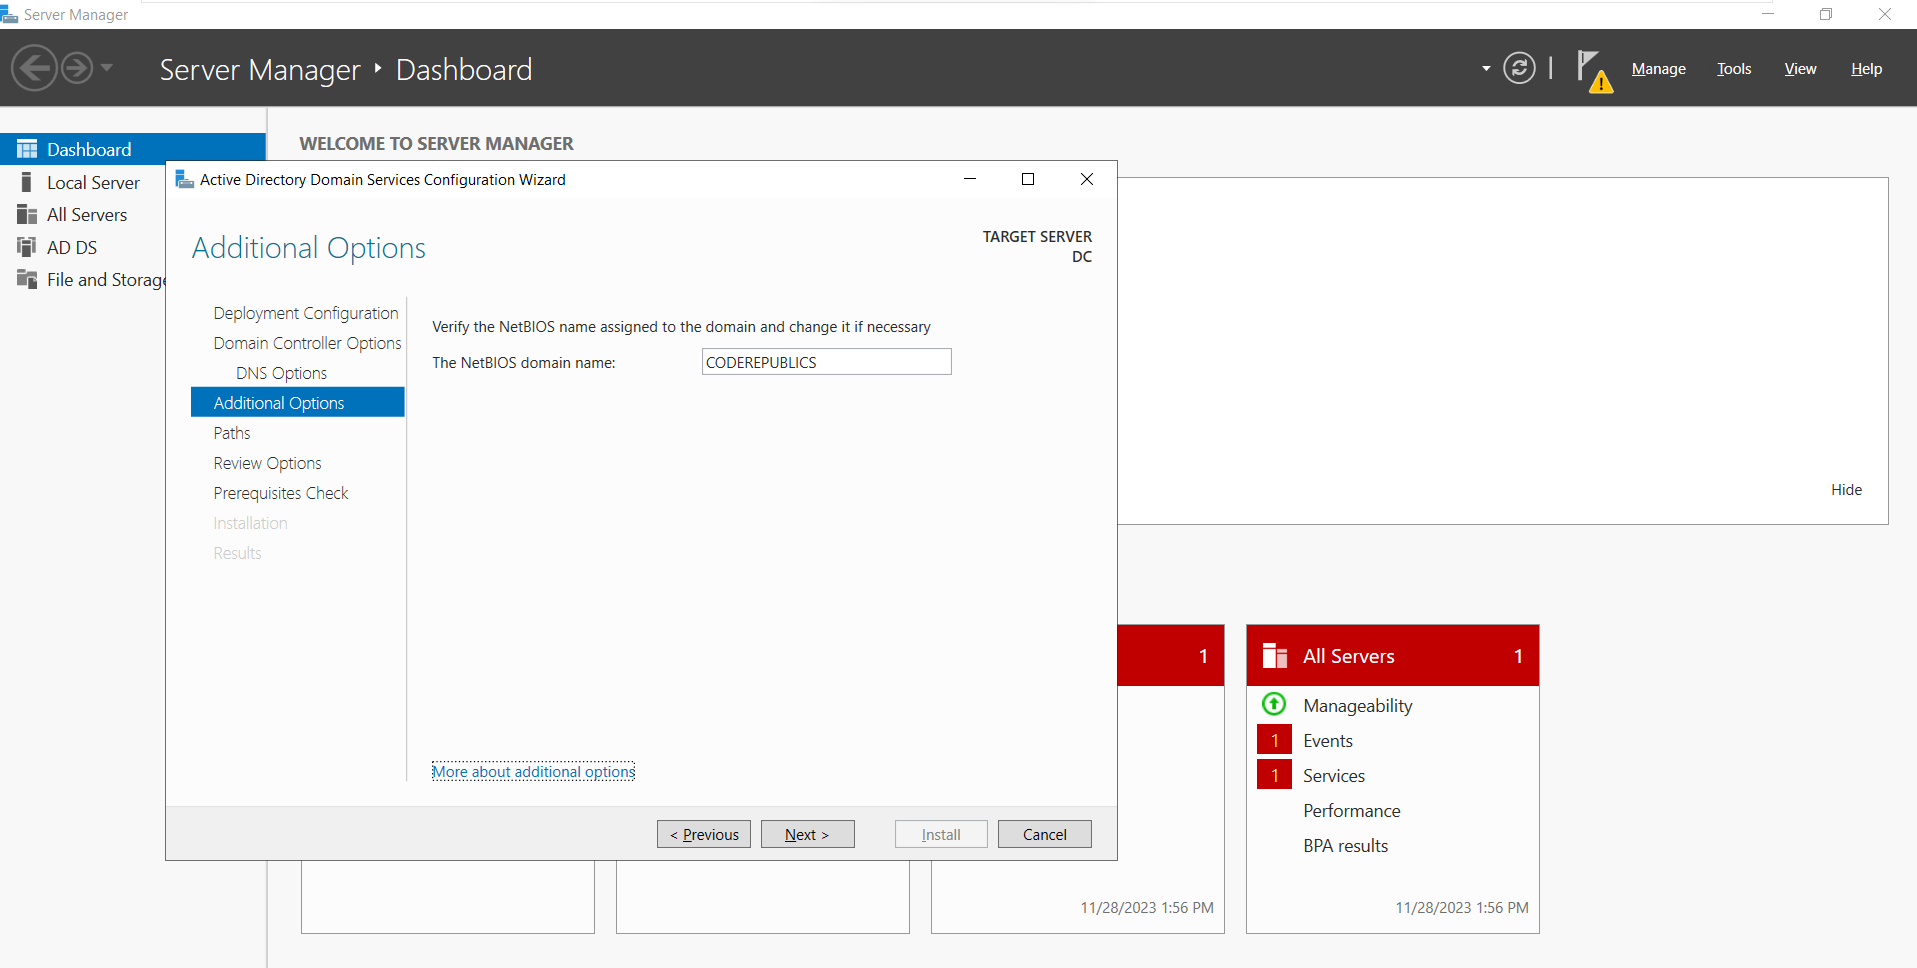 7. Path Selection
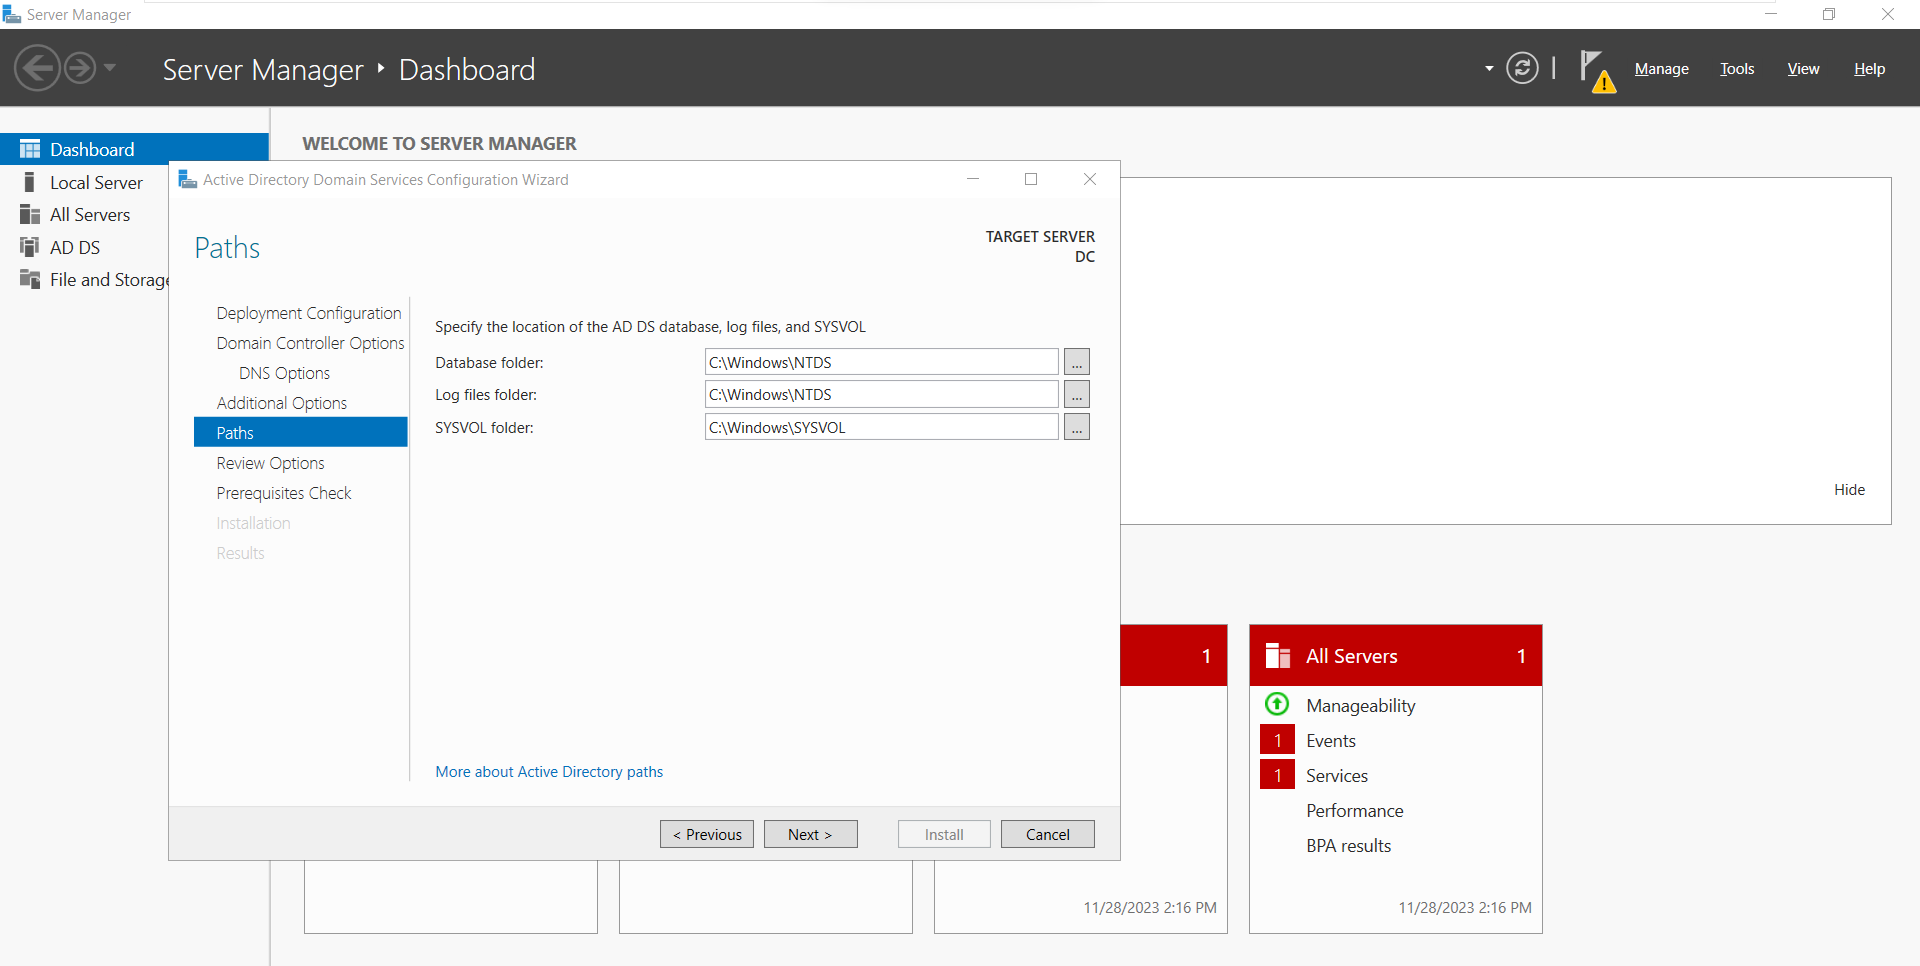
Database Folder: Active Directory stores its data in the NTDS. DIT file which is located in the NTDS folder of the system root, usually the C:\Windows\NTDS folder.
Log File Folder: Here log file of NTDS.dit database will be located.
SYSVOL Folder: A shared folder that stores the group policy information along with login and logoff scripts.
7. Path Selection
Database Folder: Active Directory stores its data in the NTDS. DIT file which is located in the NTDS folder of the system root, usually the C:\Windows\NTDS folder.
Log File Folder: Here log file of NTDS.dit database will be located.
SYSVOL Folder: A shared folder that stores the group policy information along with login and logoff scripts.
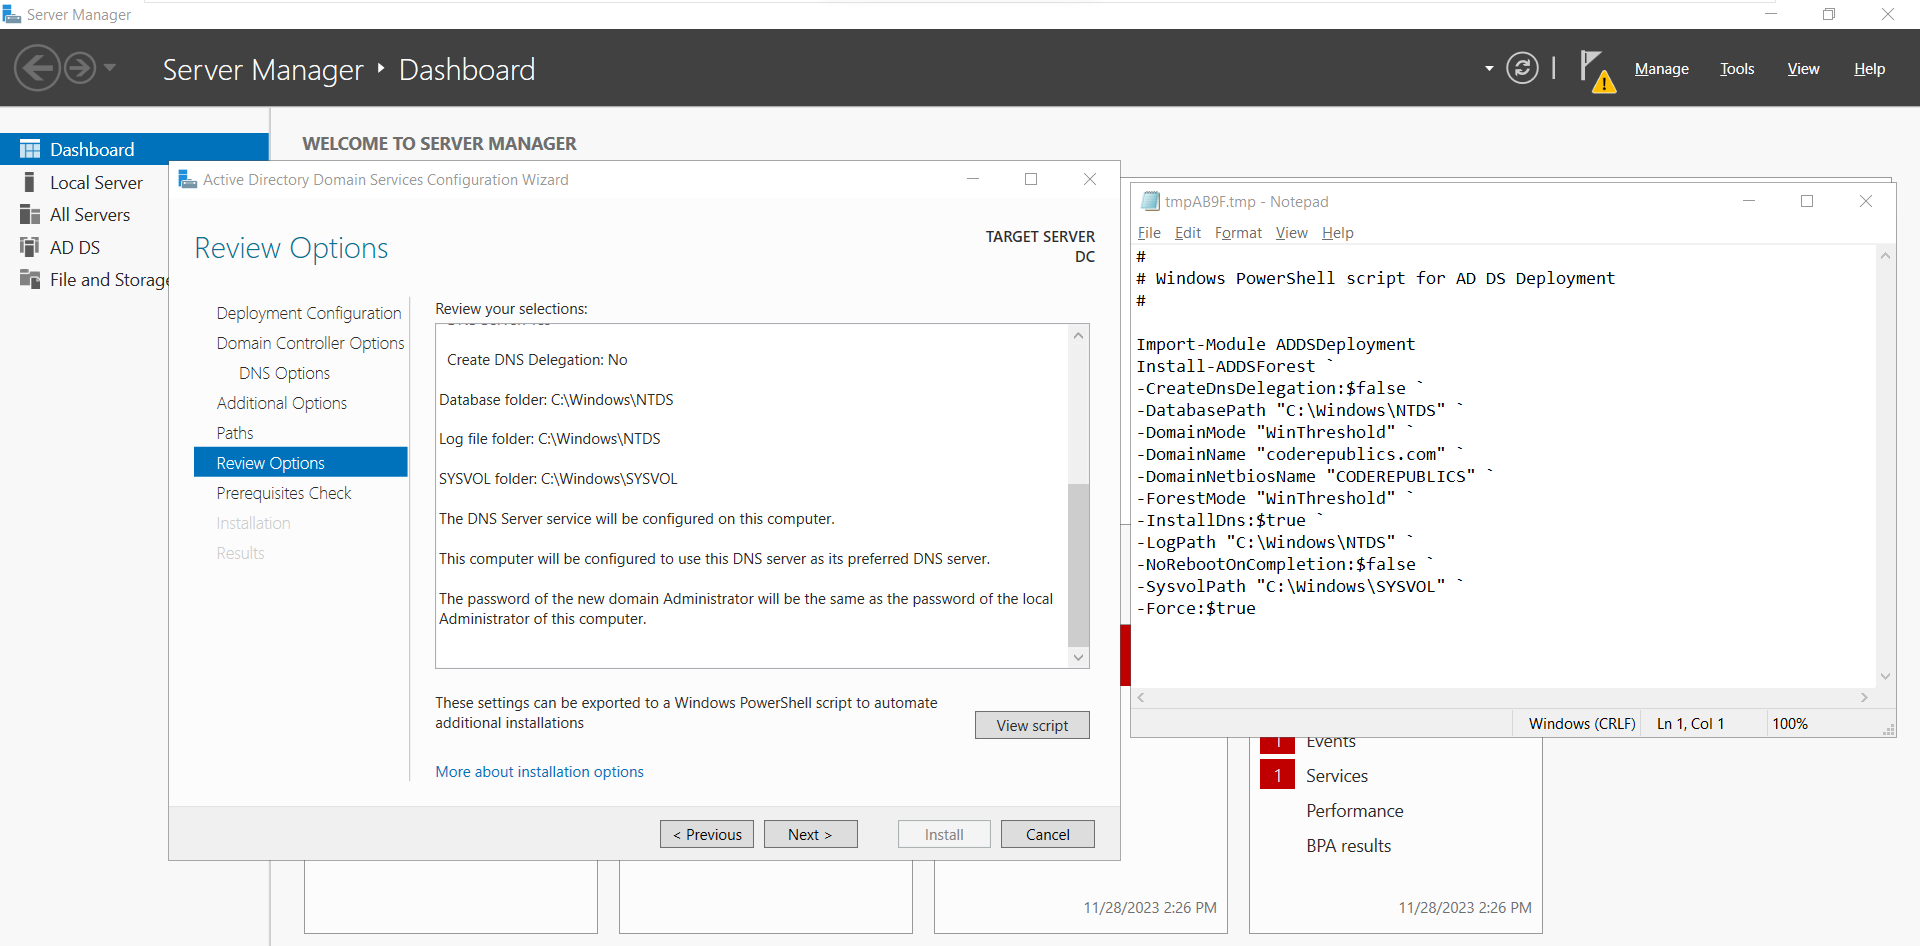
Here you can see the setting or the change you have made. You can also click on view script (A PowerShell script to install Active Directory.).
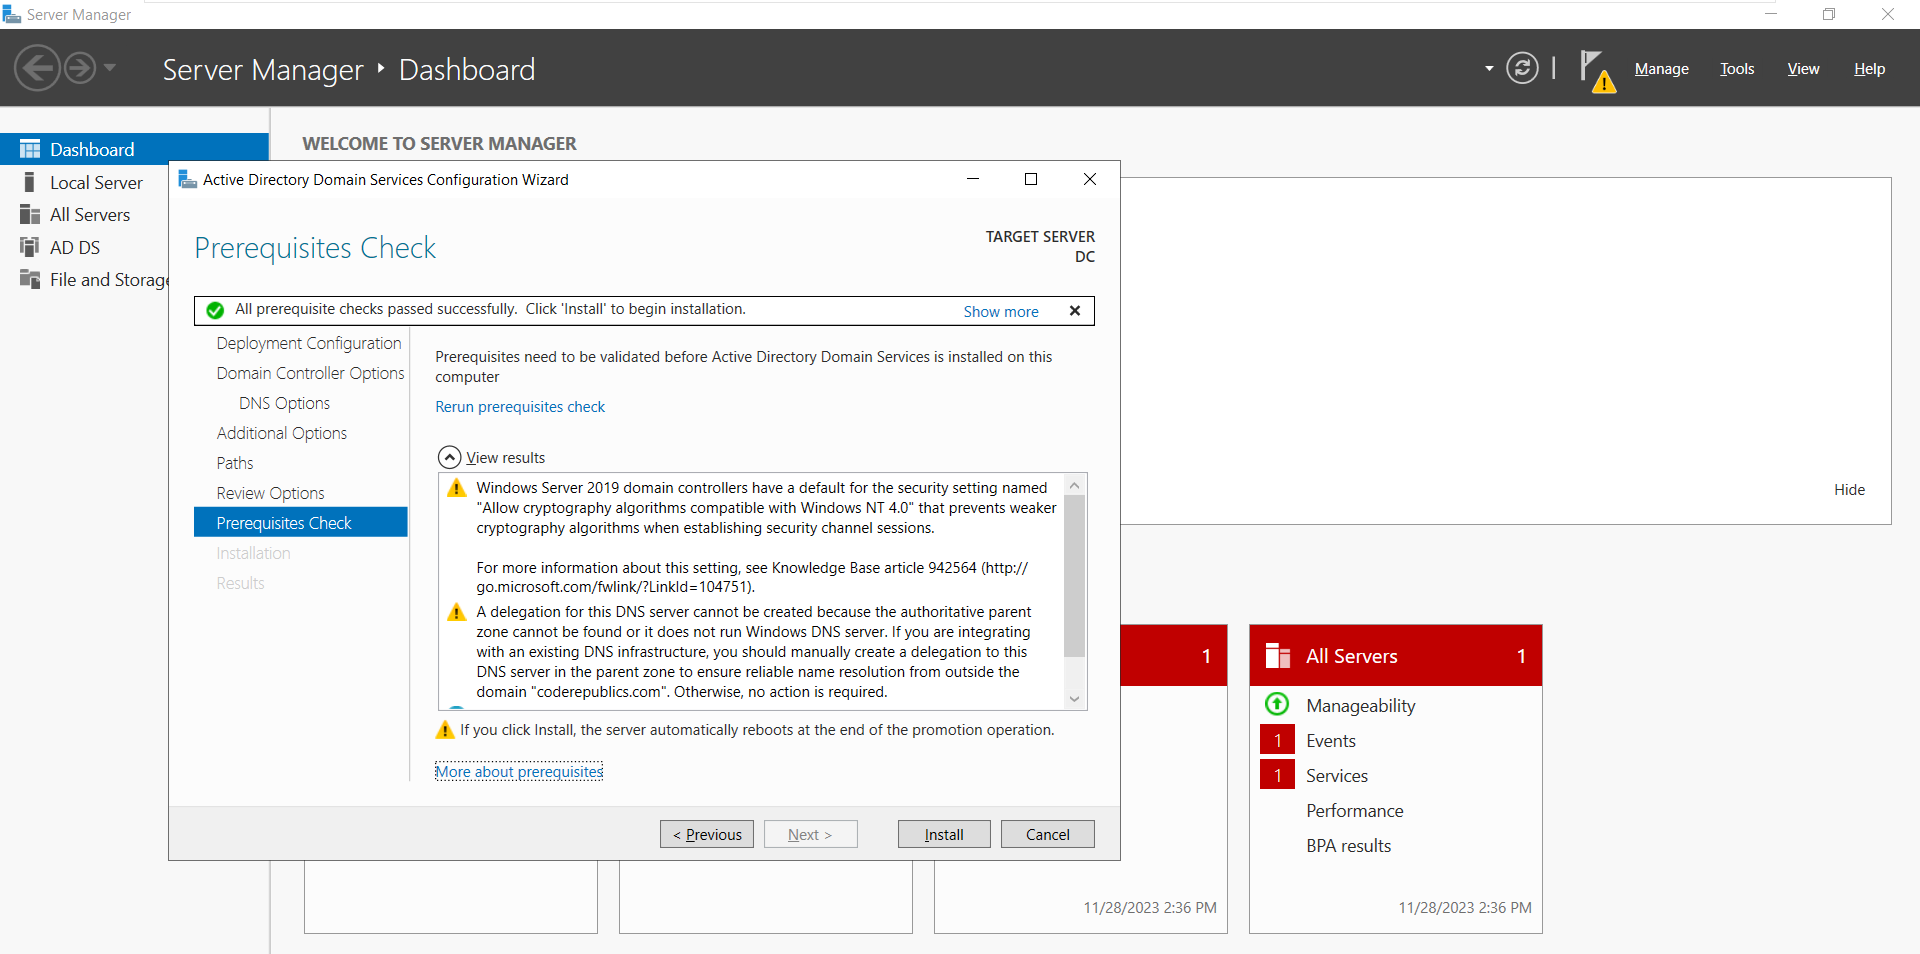
It is one of the last steps before installing and promoting the server as DC. If everything is okay without any error then you can click on install. You can avoid security notifications and a warning for the DNS delegation. Just make sure that there is a green tick mentioning “All prerequisite checks passed successfully”.
It’ll take time to install and the server will automatically reboot once completed.
Once the system reboots. Login with Admin credentials and open “Server Manager” then select “Tools” and you’ll see the Group policy management. This is the feature that we selected in step “6. Select Features”, which means that we have successfully promoted the server to Domain Controler.
To get the information about your Domain controller these commands are shown in the PowerShell. Get-ADGroupMember ‘Domain Controllers’ Get-ADDomainController -Discover -Services PrimaryDC We hope you have found this article helpful. If you have any questions or suggestions, please don’t hesitate to comment in the section below. We will certainly reply to your comments. Also, feel free to share this article with your friends. Thank you!
|


【本文地址】